ITT I Try to Justify Upgrading My Camera

I’ve said it before, and I’ll say it again: I am not a photographer. I am just a guy who enjoys taking high quality photos of the places I go and the things I enjoy doing. A couple years ago I picked up a Canon EOS Rebel T2i, a sharp 15-85mm f/3.5-5.6 zoom lens, and everyone’s favorite, the 50mm f/1.4, before a two-week trip to Japan. In the time since, I’ve taken thousands of photos and really enjoyed learning the technology and different photographic techniques. The T2i is really impressive, and is still a better camera than I am a photographer. That said, I’ve always known that I would want to upgrade at some point. The T2i is too small for my large hands to hold securely or comfortably, and I am not really fond of its plasticky build.

Meanwhile, I went through a couple hundred photos from a recent trip to Belgium with my girlfriend, and though I really like what I was able to capture, and I’m satisfied with the way they turned out, I can’t help but notice a distinct point-and-shoot quality about them. Obviously they can’t all be winners, but in the spur of the moment, it’s all too easy for me to let my zoom lens do all the work at the expense of good composition.

Looking back at my photos, I noticed that I like the ones I’ve taken with my 50mm lens the most. The fixed focal length forces me to really think about how I want the photo to look, and I have to move my feet in order to get it. Its large aperture allows me to take photos at a lower ISO level in low light, which means less sensor noise. And its shallow depth-of-field potential stimulates my creativity. I think Kai from DigitalRev explains it best:

However, with my T2i’s APS-C-sized sensor, the field-of-view of the 50mm lens is more like an 80mm lens on a full-frame sensor, which is really narrow for indoor shooting. I would have to stand all the way across the room to get anything more than just a headshot. So I started to look at what equivalent “normal” lenses I could get for my T2i.

I settled on the Canon EF 28mm f/1.8, and I’m generally very happy with it. It’s sharp, fast, and well made. However, the difference in the depth-of-field between the 50mm and 28mm is very noticeable, even at f/1.8. It’s much harder to get that nicely blurred background unless you’re within a couple feet of your subject with the 28mm. That is just the nature of wider angle lenses.

Meanwhile, Canon just released the brand-new full-frame EOS 5D Mark III and prices for the three-year-old 5D Mark II are dropping. I never would have considered getting a full-frame camera before (that’s just silly—I’m an amateur and full-frame cameras are for the pros, right?), but the prices are not much more than the 7D now. The 5D Mark II is still a great camera. One of the few things people complain about is its poor auto-focus performance. Fortunately, I learned early to use center-point and back-button focus, and I don’t shoot sports, so I couldn’t care less about auto-focus performance.

The 5D Mark II is better in almost every way compared to my T2i. It’s very well built and will fit my hands, so I’ll enjoy holding and using it. And as a bonus, the full-frame sensor will enable me to get the depth-of-field I’m used to on my 50mm lens with the field-of-view similar to my 28mm, which can open a whole new world of possibilities for me.

All of this is just to say: I think I’m going to upgrade to a 5D Mark II. I think now is the time. I am serious about improving my photography and I think sticking with only prime lenses for a while will help. It takes a huge variable out of the equation (focal length) so hopefully I can concentrate on the more important things. In fact, I’ve already sold my zoom lens. Between the money from the sale of my lens, the money I should be able to get from selling my T2i, and some credit card cash back, I will be able to pick up the 5D Mark II for a good price. It will be an early graduation present to myself. And if it turns out not to be right for me, photo gear keeps its value pretty well, so I can always sell it.

I’m not crazy for wanting to upgrade, am I?

UPDATE 05/09/2012: I managed to pick up a factory refurbished 5D Mark II during Canon’s friends and family sale for a ridiculously good price ($1596 after taxes and shipping). Canon’s refurbs, if you don’t know, are like new and mine was no exception. I sold my T2i and 15-85mm lens for $1000 after eBay and Paypal took their cut, and I allowed myself to buy a refurbed EF 100mm f/2 USM lens and Speedlite 580EX II during the same Canon sale.

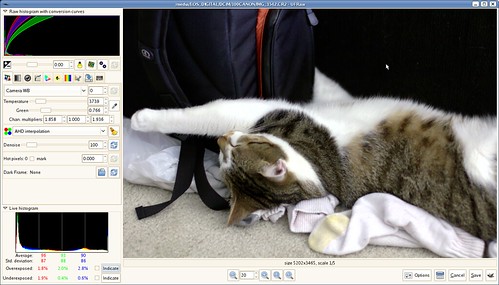
And the result? Well, I feel like I’m already starting to make some good improvements. Shooting with primes often forces me to think more creatively about composition and perspective to get the shot I want. Then taking the shots into Lightroom helps me do minor white balance and color corrections to really make them pop. And finally, the flash is just a lot of fun.


A Professional Photo Workflow for OpenSolaris

I am not a professional by any means, but I like to know I can get the most out of my tools if the need arises. That means shooting in RAW along side JPEG so I can take control of image processing settings or correct little mistakes such as under-exposure or incorrect white balance. RAW files contain raw sensor data from the camera (duh) and must be processed by special programs before they can be printed or shared. My camera came with the Canon Digital Photo Professional software which I’ve heard is pretty good. There are other (expensive) commercial options such as Adobe Lightroom. Obviously none of these work in Solaris (though they might work in Wine), so I decided to explore the open-source offerings.

Fortunately, this is a good time in the open-source world for RAW processing. Tools like UFRaw and LensFun are maturing rapidly and beginning to give their commercial counterparts a run for their money. I spent the past week porting them, and the color management software, Argyll, to OpenSolaris.

Argyll

Argyll is a suite of color management tools for Unix and Windows. It can be used to calibrate displays, cameras, scanners, and printers. When all of your equipment is properly calibrated, then colors should appear the same on all devices. So if I were to photograph a stop sign, it would appear to be the same red on my monitor as in real life.

Color Calibration Tools

Color calibration requires special equipment. For your monitor, you need a colorimeter. I already had an X-rite i1Display to calibrate my TVs, and it works just fine with Argyll and Solaris (using libusb). Following these instructions I was able to calibrate my monitors in a few minutes. It was so easy I did my work monitors and laptop too!

Camera calibration was just as easy following Pascal de Bruijn’s instructions. I picked up a very affordable IT8.7 target from Wolf Faust. It arrived from Germany in about a week.

Argyll can be installed from my software repository by typing pfexec pkg install SFEargyll.

UFRaw

UFRaw

UFRaw with lens correction support using LensFun can be installed from my repository by typing pfexec pkg install ufraw. I went through hell trying to port this and its dependencies. LensFun was particularly terrible with its crazy Makefiles (please use Autotools!) and non-standard C++ which Sun Studio choked on.

I don’t have much else to say about this yet, I’m still playing around with it.

Building a Photography Light Box

Light boxes (or light tents) provide a scene with even lighting and a seemingly no background, great for product photography. You can make one yourself with stuff you probably already have lying around. You will need:
Supplies

  • A cardboard box
  • White poster board
  • White tissue paper
  • Scissors
  • Ruler or tape measure (for straight lines)
  • Pen (to mark lines)
  • Clamp lamps
  • 100 watt light bulbs. I use GE “Reveal” bulbs which supposedly approach the color temperature of the sun.
  • Tape such as Scotch tape or masking tape.
 

Cut Holes Start by cutting a window on the left and right sides of the box, leaving about a one inch border for structural support. You may find it easiest to start in the middle of the window and cut out small sections at a time.

Line Box with Poster Board
Next, erect the box and line it with the white poster board. Make sure you put the matte side of the poster board facing out to avoid any unwanted reflections. Also create a small curve in the poster board toward the back of the box to give the illusion that it goes on forever.

Line Sides with Tissue Paper
Then line the open sides of the box with tissue paper. This diffuses the light evenly over the inside of the box. You will have to experiment with how many layers of tissue paper is required. I’ve started with two.

Attach Lamps
Now you’re ready to attach the lamps. I’m using clamp lamps which I picked up from Home Depot for $5 each. They attach firmly to the box sides and can be repositioned very easily. You can use desk lamps if you don’t have these.

Please have a fire extinguisher rated for paper and electrical fires handy. 200 watts of very hot lamps and and tissue paper don’t mix.

Align Lamps
You will have to reposition the lamps to get the best possible lighting. Here I’ve held the lamps close to the windows using masking tape. You will have to experiment with this.

Adjust White Balance
Before you begin, make sure you set a custom white balance. This is different for every camera, but typically you will take a photo of just the white background and the camera can figure it out from that. Then choose an object and try it out.

This was my very first test:

Guinness

My other test did not turn out as well:

PhonePhone

I will either need more light or more experimentation with exposure settings in order to get the background more white.

Either way, this light box was simple, fun, and cheap to create. I hope this has inspired you to try it out yourself!